

Setting up an S3 custom domain is the most important step in turning your project into a professional website. You’ve successfully launched a static website on Amazon S3, but the default URL looks something like http://your-bucket-name.s3-website-us-east-1.amazonaws.com. While functional, this isn’t a memorable address.
The solution is to connect your S3 website to a custom domain name that you own (e.g., www.your-awesome-site.com). To do this, we will use another foundational AWS service called Amazon Route 53, which is Amazon’s Domain Name System (DNS) web service.
This guide will walk you through the entire process of configuring Route 53 to point your S3 custom domain to your S3 bucket.
Prerequisites
- A registered domain name (purchased from any registrar like GoDaddy, Namecheap, etc.). For more details on DNS, you can read the Cloudflare guide on what DNS is.
- An S3 bucket that is already configured for static website hosting.
Most Critical Rule:
For Route 53 to properly route traffic to your S3 bucket, the bucket name must exactly match your custom domain name.
- If you want to host your site on
www.example.com, your bucket name must bewww.example.com. - If you are hosting on the root or apex domain,
example.com, the bucket name must beexample.com.
Any deviation from this naming convention will prevent the setup from working correctly.
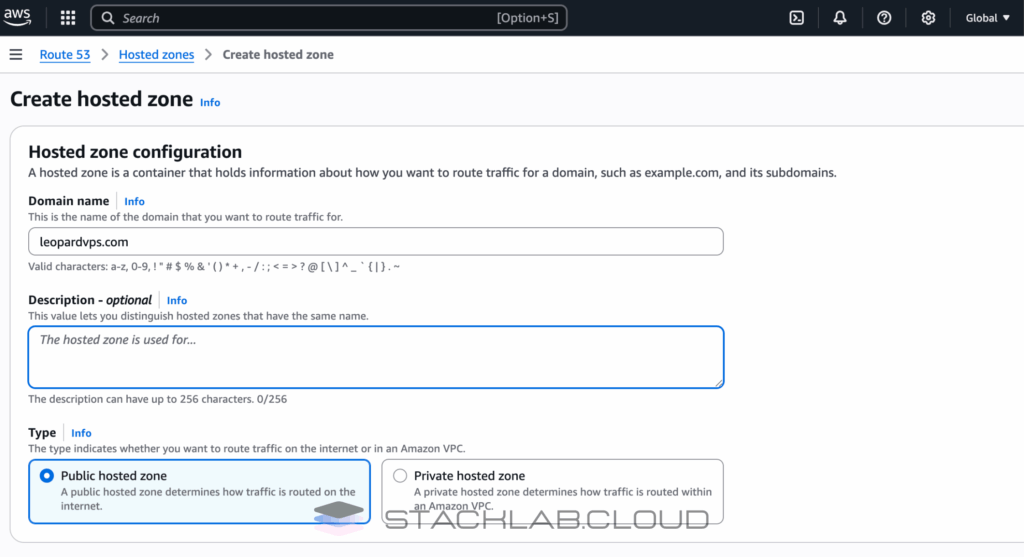
Step 1: Create a Hosted Zone in Route 53
The first step is to tell Route 53 about your domain. You do this by creating a “Hosted Zone,” which is essentially a container that holds all the DNS records for your domain.
- Navigate to the Route 53 Console in AWS. (You can search for “Route 53” in the main search bar).
- On the left-hand menu, click on “Hosted zones”.
- Click the orange button that says “Create hosted zone”.
- In the “Domain name” field, enter your root domain name without any `www` or `http` (e.g.,
stacklab.cloud). - For “Type,” ensure “Public hosted zone” is selected.
- Click the “Create hosted zone” button at the bottom.
Step 2: Note Your Route 53 Name Servers
Once the hosted zone is created, Route 53 will automatically assign four “Name Servers” (NS) to it. These servers are what tell the rest of the internet where to find the DNS records for your domain.
- Inside your newly created hosted zone, you will see a record with the “Type” of NS.
- Copy these four server addresses (e.g.,
ns-1234.awsdns-56.co.uk.). Keep them in a text file for the next step.

Step 3: Update Name Servers at Your Domain Registrar
This is a critical step that happens outside of the AWS console. You need to log in to the company where you purchased your domain name (e.g., GoDaddy, Namecheap) and tell it to use the AWS name servers.
- Log in to your domain registrar’s website.
- Find the DNS management or name server settings for your domain.
- Replace the existing default name servers with the four AWS name server addresses you copied in the previous step.
- Save your changes.
Note: This change can take anywhere from a few minutes to 24-48 hours to propagate across the internet. This is a normal part of how DNS works.
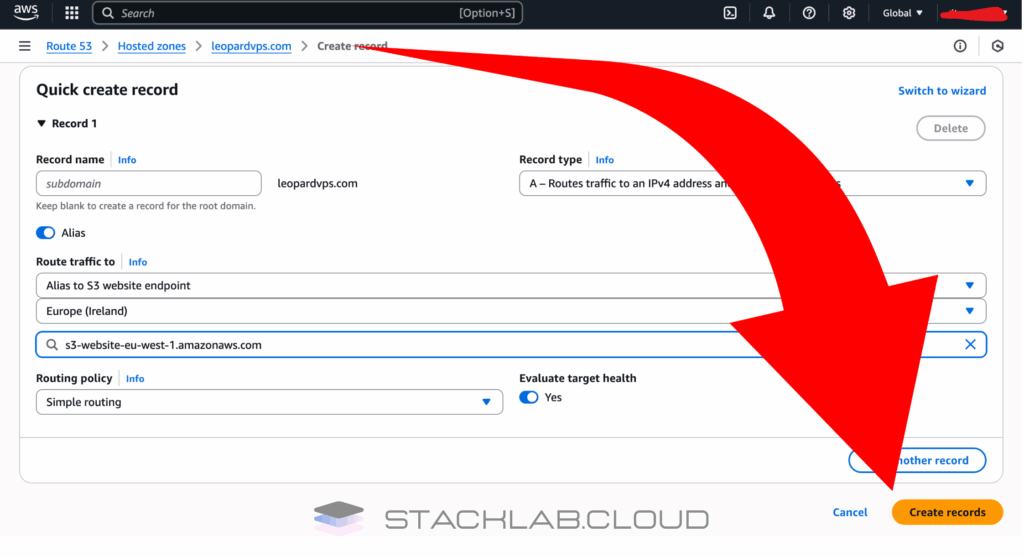
Step 4: Create DNS Records for Your S3 Custom Domain
Now, back in the AWS Route 53 console, we will create the records that point traffic for your S3 custom domain to your S3 website.
- Inside your hosted zone, click the “Create record” button.
- For this first record, we will configure the root domain (e.g., `stacklab.cloud`). Leave the “Record name” field blank.
- Toggle the switch for “Alias” to ON. This allows you to point directly to an AWS resource.
- In the “Route traffic to” dropdown, choose “Alias to S3 website endpoint”.
- Another dropdown will appear. Choose the region your S3 bucket is in.
- Your S3 bucket’s endpoint URL should appear. Select it.
- Click “Create records”.
You can repeat this process to create a record for the `www` subdomain (e.g., `www.stacklab.cloud`), also pointing it to the same S3 website endpoint.
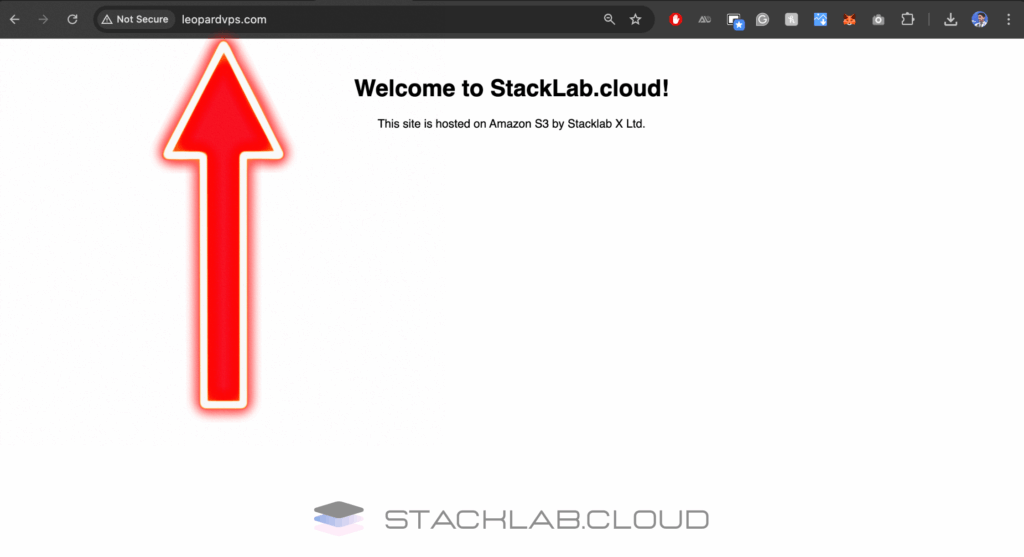
Step 5: Test Your Custom Domain
Once DNS has had time to propagate (you may need to wait a few hours), it’s time to test.
- Open a new browser tab and type your custom domain name (e.g.,
http://stacklab.cloud) into the address bar.
If everything was configured correctly, you should see the `index.html` page from your S3 bucket! You have successfully connected your domain to your website.
Conclusion
Connecting an S3 custom domain is a major step in turning a project into a professional website. By using Route 53, you have created a scalable and reliable DNS setup that integrates perfectly with your S3-hosted site. Your website is now accessible to the world through a clean, memorable address.
The next logical step is to secure your site with an SSL/TLS certificate so you can use HTTPS.
Read Next: How to Add SSL (HTTPS) to an S3 Website with CloudFront
Frequently Asked Questions
What is the main advantage of using Route 53 with an S3 static website?
Using Amazon Route 53, AWS’s scalable Domain Name System (DNS) web service, allows you to point your professional, custom domain name (e.g., www.your-awesome-site.com) to your website files stored in an S3 bucket. This replaces the default, lengthy S3 website endpoint with a memorable and branded domain, making your site easily accessible to users.
How do I handle both www.example.com and example.com?
To ensure visitors can reach your site with or without the “www” prefix, you should create two S3 buckets:
Primary Content Bucket: Name this bucket after the full domain you want visitors to see (e.g., www.example.com). This bucket will contain all your website’s files (HTML, CSS, JavaScript, etc.).
Redirect Bucket: Name this bucket after the other domain variation (e.g., example.com). This bucket will be empty. In its properties, you will configure static website hosting to redirect all requests to your primary content bucket.
What kind of record do I create in Route 53?
You should create an Alias record. An Alias record is a special Route 53 feature that lets you map your domain to AWS resources, like an S3 bucket configured for static website hosting.
When creating the record in your Route 53 hosted zone:
Set the Record type to A – Routes traffic to an IPv4 address and some AWS resources.
Enable the Alias toggle.
For the Route traffic to dropdown, select Alias to S3 website endpoint.
Choose the AWS Region where your S3 bucket is located.
Select your S3 bucket from the list.
Why isn’t my S3 bucket showing up in the Route 53 alias target list?
This is a common issue with a few likely causes:
Bucket Name Mismatch: The S3 bucket name does not exactly match the record name you are trying to create in Route 53.
Static Website Hosting Not Enabled: You have not enabled static website hosting in the properties of your S3 bucket.
Region Mismatch: You might be looking in the wrong AWS Region in the Route 53 dropdown. Ensure you select the same region where your S3 bucket was created.
How do I enable HTTPS for my custom domain? S3 only gives me an HTTP endpoint.
You are correct; S3 static websites do not natively support HTTPS. To secure your website with an SSL/TLS certificate, you must use Amazon CloudFront, AWS’s content delivery network (CDN). Read our next tutorial about how to enable https using CloudFront.
My website isn’t loading, and I’m getting a DNS_PROBE_FINISHED_NXDOMAIN error. What’s wrong?
This error typically indicates a DNS resolution problem. A common cause is that the nameservers for your domain registered with a third-party registrar do not match the nameservers provided by your Route 53 hosted zone.
To fix this, you must log in to your domain registrar’s control panel and update the nameserver records to the four values provided in your Route 53 hosted zone. Keep in mind that DNS changes can take up to 48 hours to fully propagate across the internet.
I’m getting an “Access Denied” error when trying to view my website. How do I fix this?
An “Access Denied” error usually means that the public access permissions for your S3 bucket are not configured correctly. To resolve this, you need to add a bucket policy that allows public read access to the objects in your bucket.


