

You’ve just learned about Amazon S3 and its power as a scalable object storage service. The theory is great, but the best way to understand S3 is to get hands-on. The very first step in using S3 is to create a “bucket”—a container that will hold all your data.
This guide will walk you through the simple, step-by-step process of creating your first S3 bucket using the AWS Management Console. In less than five minutes, you will have your own private storage space in the cloud, ready to hold your files.
Prerequisites
- An active AWS Account.
Step 1: Navigate to the S3 Console
First, we need to get to the right place in the AWS Management Console.
- Log in to your AWS Management Console.
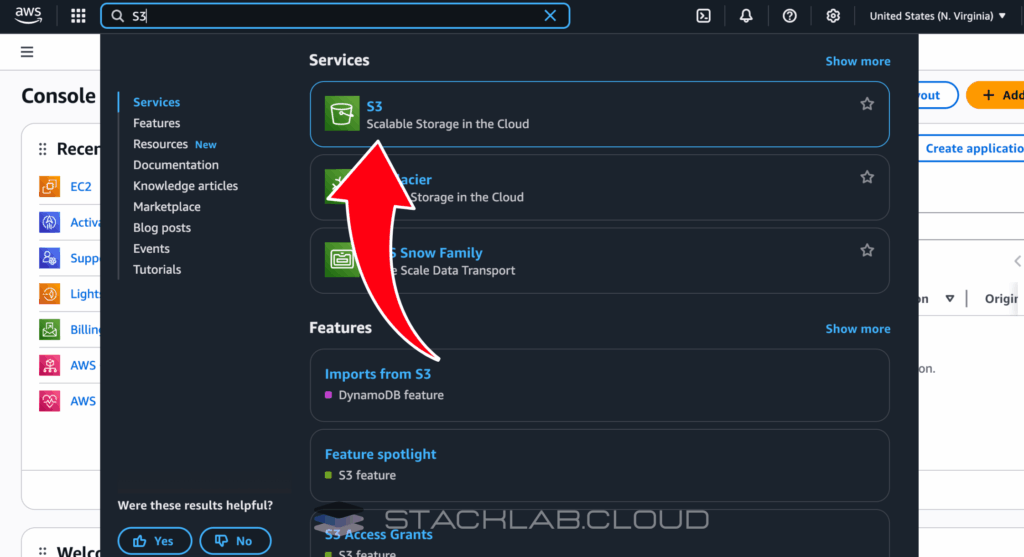
- In the main search bar at the top, type S3 and press Enter.
- Click on the S3 service in the search results to go to the S3 Dashboard.
Step 2: Start the “Create Bucket” Process
From the S3 dashboard, you will see a list of any existing buckets (which will be empty if this is your first time).
- Find and click the prominent orange button that says “Create bucket”.
This will open the main configuration wizard for creating your new bucket.
Step 3: Choose a Bucket Name and AWS Region
This is the most important step, as the bucket name has a critical rule you must follow.
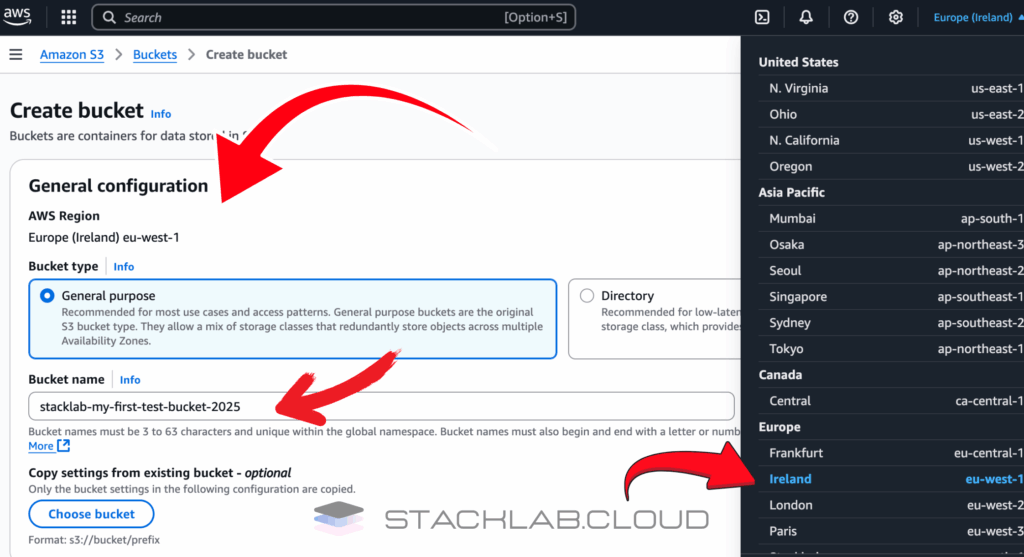
- Bucket name: Enter a name for your bucket. This name must be globally unique across all of AWS. This means no other AWS customer in the world can have a bucket with the same name. Think of it like a domain name. Use only lowercase letters, numbers, and hyphens. For example:
stacklab-my-first-test-bucket-2025. - AWS Region: Select the AWS Region where you want your bucket to reside. For best performance, choose the region that is geographically closest to you or your users. For example, if you are in Europe, choose a region like
Europe (Ireland) eu-west-1.
Step 4: Configure Public Access Settings
Security is paramount in AWS. By default, S3 buckets are completely private.
- For the section “Block Public Access settings for this bucket”, leave the box for “Block all public access” checked.
This is the secure default and is highly recommended. It ensures that no one on the public internet can access your files unless you explicitly grant them permission later. We will cover how to do that in a future tutorial.

Step 5: Bucket Versioning and Tags (Optional)
The wizard will show you a few other options.
- Bucket Versioning: This is a powerful feature that keeps a history of all versions of your objects, protecting you from accidental deletions. For now, you can leave it Disabled.
- Tags: Tags are key-value pairs that help you organize and manage your AWS resources. This is very useful for cost tracking in larger projects. For now, you can leave this blank.
Step 6: Create and Verify Your Bucket
You’re ready to create the bucket.
- Scroll to the bottom of the page and click the orange “Create bucket” button.
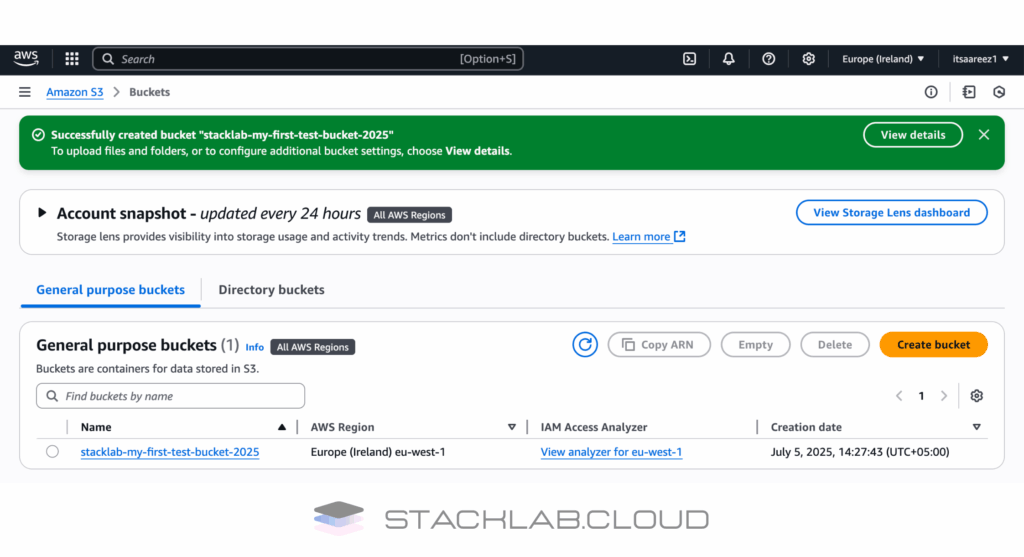
- If the name you chose was unique, you will see a green success banner at the top of the page.
- You will be returned to the S3 dashboard, where you will now see your new bucket listed.
Conclusion
Congratulations! You have successfully created your first secure, private storage container in the AWS cloud. This S3 bucket is now ready to store anything you want, from website assets and application data to important personal backups.
You’ve mastered the foundational step of using S3. Your next step is to learn how to put data into your new bucket.
Read Next: How to Upload Files to an S3 Bucket (Step-by-Step)


