

You now understand what AWS IAM is and why using your root account for daily tasks is a major security risk. The single most important action you can take to secure your account is to stop using your root user and start using an IAM user with limited permissions.
The first step on this journey is to create an AWS IAM user for yourself. This user will act as your day-to-day administrator, with specific permissions that you define, protecting your root account from unnecessary exposure.
This ultimate guide will walk you through the entire process step-by-step, from creating the user to assigning permissions and securely saving their credentials.
Prerequisites
- An active AWS Account, logged in as the root user.
Step 1: Navigate to the IAM Dashboard
First, we need to get to the IAM service within the AWS Management Console.
- Log in to your AWS Management Console as the root user.
- In the main search bar at the top, type IAM and press Enter.
- Click on the IAM service in the search results. This will take you to the main IAM Dashboard.

Step 2: Add a New IAM User
From the IAM dashboard, we will begin the user creation process.
- In the left-hand navigation pane, click on “Users”.
- Click the prominent blue button that says “Create user”.
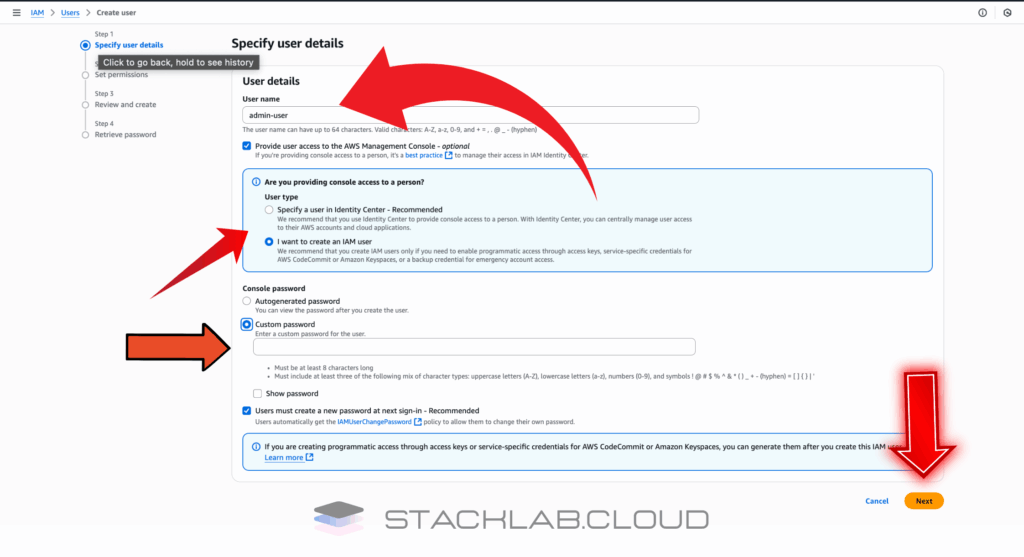
Step 3: Specify User Details and Access
This is where you will define the user’s name and how they can access AWS.
- User name: Enter a name for your user. For your first admin user, something like
admin-useror your own name is a good choice. - Provide user access to the AWS Management Console: Check this box. This will allow the user to log in to the web dashboard.
- Select the option “I want to create an IAM user”.
- Console password: Select “Custom password” and create a strong, secure password.
- User must create a new password at next sign-in: It’s a good practice to leave this checked for new users you create for others, but for your own admin user, you can uncheck it.
- Click the “Next” button.
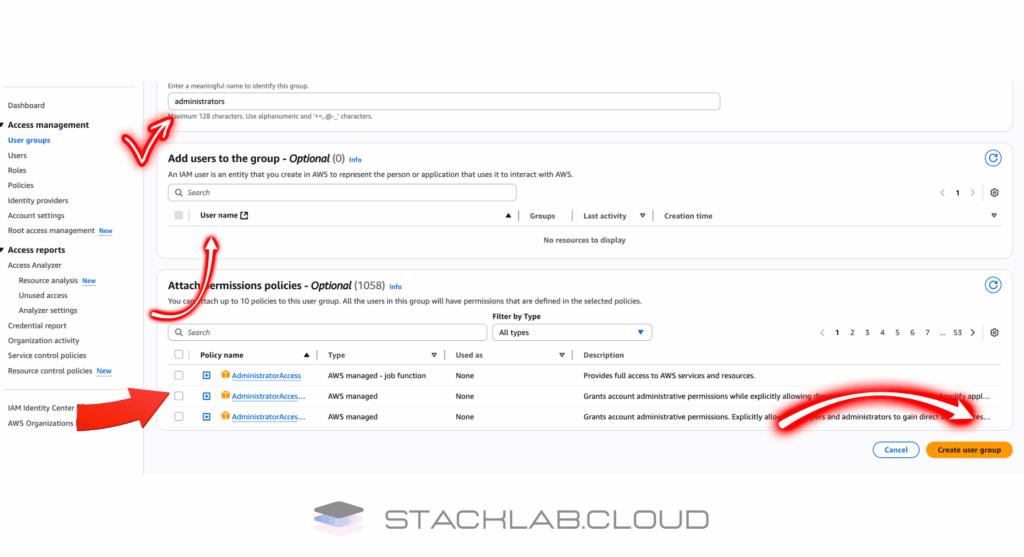
Step 4: Set Permissions by Creating a Group
This is the most critical step where we follow the best practice of assigning permissions to a group, not directly to the user.
- On the “Set permissions” page, select “Create group”.
- User group name: Give the group a logical name, like
Administrators. - Permissions policies: In the search box, type
AdministratorAccess. - Check the box next to the “AdministratorAccess” policy. This is an AWS-managed policy that grants full access to all AWS services, effectively making any user in this group an administrator.
- Click the “Create user group” button.
- You will be returned to the “Set permissions” page, and your new `Administrators` group will be created and selected. Click “Next”.
Step 5: Review and Create the User
The final step is to review your settings.
- The review page will show you the username and the permissions policy summary. Verify that everything looks correct.
- Scroll to the bottom and click the “Create user” button.
Step 6: Securely Save Your Credentials
The next screen is very important. It’s your only chance to see and download the user’s initial credentials.
- You will see a green success message.
- You will also see the Console sign-in URL. This is a special URL for IAM users to log in. Bookmark this link.
- Click the “Download .csv file” button. This file contains the username, password, and the Access Key ID and Secret Access Key for programmatic access. Store this file in a very secure location.
Once you have saved the credentials, you can click “Return to users list.”
Conclusion
Congratulations! You have successfully learned how to create an AWS IAM user and have taken the most important step in securing your AWS account. You now have a dedicated administrator user and should use this user for all your daily tasks, leaving your root user safely locked away.
By using IAM Users and Groups, you are building on a foundation of security and best practices that will allow you to manage your cloud environment safely as it grows.
Read Next: How to Enable Multi-Factor Authentication (MFA) on Your IAM User


